Handy Village Homebrew Workshop, with Dan Bartmann

The Handy Village Institute is preparing for their third Homebrew Wind Turbine Workshop, with Dan Bartmann as guest instructor, March 19-24, 2018, near Saxapahaw. Details and registration information: handyvillage.com.

FlyerEddy2018Turbine

Posted in construction, courses, Notices | 4 Comments

Charge controllers – a brief introduction

Why do we need charge controllers? To prevent batteries from being damaged by charging too hard.  As you charge a battery, its voltage rises, which is all good up to a point.  However if the voltage gets too high the battery may overheat, dry out explode etc.

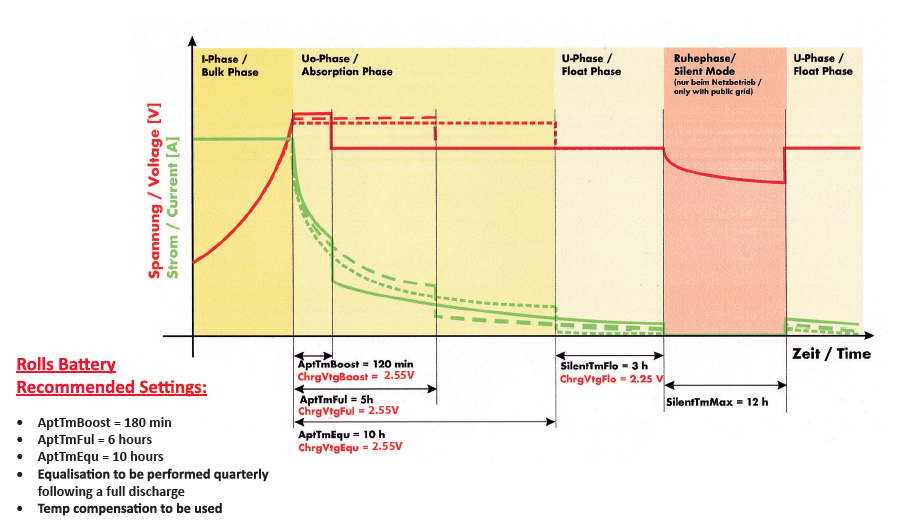
How do charge controllers work? The controller monitors the battery voltage and limits the charging current to prevent it from pushing the voltage above a chosen level or “set-point”.  This diagram shows the process as recommended for Rolls batteries when used with SMA inverters.  There are several phases of battery charging, each with its own set-point voltage that the controller should observe.  These voltages are also temperature compensated (adjusted to allow for battery temperature rise or fall).

So it can get pretty complex.  But a simple charge controller that limits the charge rate to prevent a 12V battery from exceeding 14V during charge may be all that you need in reality.  Make sure that your charge controller is set correctly for the battery make and type.  Sealed batteries (gel type), for example, may need lower settings for safe operation.

How do they limit the charge rate? Solar charge controllers are wired between the solar array and the battery so that they can act like a switch and turn off the charging current.  Mostly they will do this in rapid pulses and control the average charge rate by the width of the pulse (Pulse Width Modulation or PWM).  (Often nowadays they will also use Maximum Power Point Tracking or MPPT but this has nothing to do with charge control.  It’s just an additional separate function of the charge control device, to improve the performance of the solar array.)

It’s not a case of turning off the charge when the battery is “full” so much as optimising the charge rate from maximum available current at first, down to a trickle charge current into a well charged battery on float.

What is diversion charge control and why is it better? Another way to limit battery charge rate is to divert current away from the battery and into a “dump load” otherwise called a diversion, ballast, or shunt, that is almost always some kind of heater/resistor to dissipate the excess energy safely as heat.  The controller is often connected directly to the battery rather than between battery and source.  The dump load is chosen so that it can use all the current you will get that is not controlled in any other way.  But it must not exceed the amperage capacity of the controller itself.  There are two advantages to using the energy rather than switching the current off.

  • One is that it can provide useful energy harvest (for making hot water for example and avoiding the need to burn fuel).
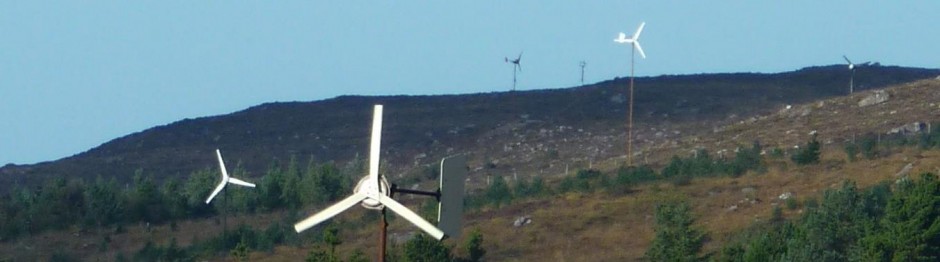
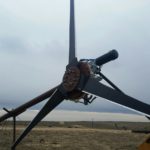
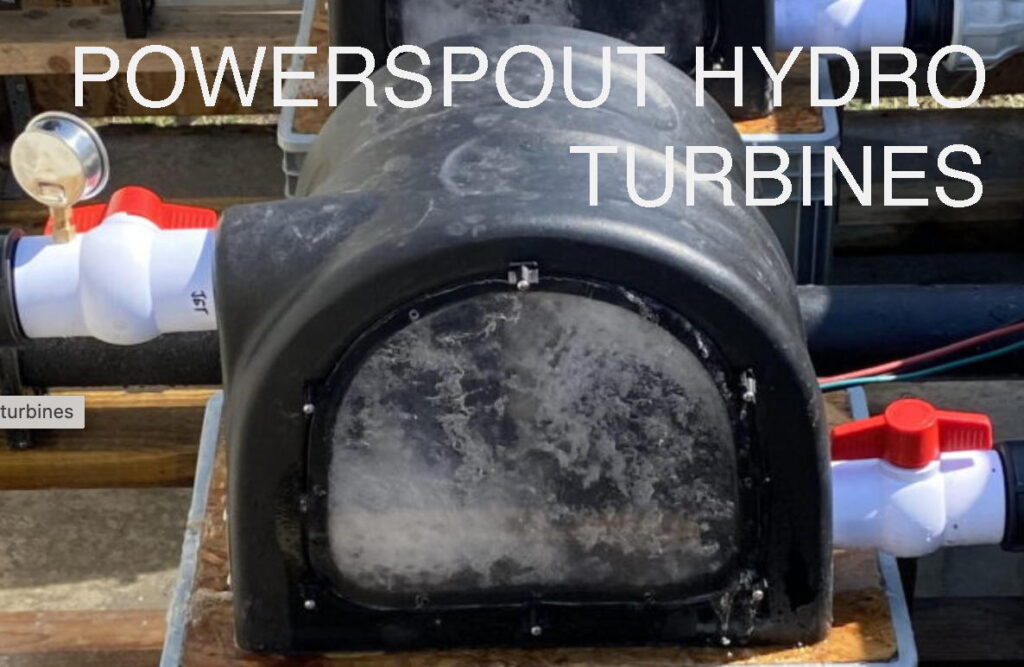
  • Another is to prevent overspeed of disconnected wind or hydro turbines where these are the source of the energy.

An unloaded turbine speeds up and becomes noisy, adding to wear and tear and producing higher output voltage that can destroy the controller.  If you only have solar and you do not need hot water then there is no advantage to a diversion controller.

What’s the best way to control a hybrid system (with both solar PV and wind/hydro turbine)? You can do this with one big diversion controller.  The controller connects to the battery and the charging sources each connect directly to the battery.  Here is a typical wiring diagram.  You can buy an MPPT controller (to improve performance) but you don’t have to.  Actually I find that a standard grid-tied solar panel connected directly to a 24V battery is close enough to its maximum power point that you don’t need MPPT for short wire runs.  Or you can use a solar MPPT controller (and a hydro MPPT controller) alongside a diversion controller.

Will the charge controllers conflict with each other in a hybrid system? Where you have a solar(usually MPPT) charge controller and a wind or hydro diversion charge controller on the same battery then the settings for both controllers must be suitable for the battery type.  They may not agree perfectly as to the set-point voltage for optimum charging all of the time and at every stage, but they don’t need to.  Think of them as a committee of experts.  Committees rarely agree, but whoever you listen to is probably going to do a good job, being an expert after all.

What happens if the diversion controller is not big enough to dump the solar power? You might have a hybrid system with 2kW of solar PV working 2 sun-hours per day and 200W of hydro working 24 hours.  (The wee hydro produces more kWh of energy than the solar.)  The dump load should be sized for the hydro (at least 200W).  What happens if it starts to dump solar power?  The dump load itself has an inherent maximum current.  So long as the diversion controller can handle the current in the dump load on 100% duty there is no problem.  It will not be overloaded.  If this fails to control the battery voltage then it will rise slightly and the solar controller will back off solar current and limit the charge rate according to its (slightly different) chosen set-point.

How do I set the controllers to make best use of the solar power to heat water? If your diversion controller is heating water then you may want it to produce as much as possible.  In this case you should set the voltages slightly lower in the diversion controller and slightly higher in the MPPT one so that the diversion operates first on rising voltage and the MPPT acts as a safety net if the diversion load is maxed out and the voltage rises further.  Make sure that both controllers have setting that are acceptable to your battery.  Set your hydro MPPT controller to the highest set-points of all so that your hydro is never unloaded.  This controller is only valuable for MPPT function (and it’s also comforting as a safety net in case the diversion control fails).

Where can I get a diversion controller? The best ones on the market are the Morningstar Tristar 45 and Tristar 60 controllers.  The Xantrex C40 is kind of OK but a lot less stable in operation.  There are not many other commercial ones available.  Here is one.    Missouri wind and solar offer one but I don’t know if they are good (comments?).

You can find low cost ones that divert hundreds of amps via a relay but these are rather crude in operation.  Most diversion controllers have a diversion mode and a solar mode so make sure you understand the difference and configure the controller correctly for your needs.  Some divert directly off the turbine and stall it so it slows down but these will not give you much useful hot water from a wind turbine in low winds.

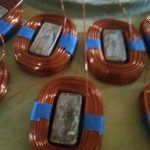
Can I make my own charge controller? Yes indeed.  It’s a fun DIY electronics project.  I have made a lot of them in the past but to be honest the Tristar is cost-effective and much better in so many ways.  But I will try to do another post soon with details of various DIY charge control projects.


Posted in Diversion load control, products/technical, wind systems tutorial | 8 Comments

Another design proposal from Adriaan Kragten

Adriaan tells me:

“Recently I have written report KD 645 about the design of a new type 10-pole radial flux PM-generator with no iron in the coils and a simple 1-layer winding. This report can be copied for free from my website www.kdwindturbines.nl at the menu KD-reports.”

This is a ten pole design with 3-phase output using a standard motor body to enclose the working parts.  It’s great for keeping the magnets dry!  There is no iron in the stator which should mean it will be easy to start with no iron loss.  I suspect there will be some eddy current loss in the motor body (not shown in drawings) that encloses the coils.  Cooling of the coils will not be very effective though, which will place a limit on the continuous power output of the turbine.

The magnetic flux will be very weak and the actual performance (voltage per coil-turn per rpm) is yet to be determined.  Adriaan tells me “the costs of a PM-generator with an iron stator and about the same maximum torque level are much lower.”

I have no intention to build a prototype and test it but it would be good if someone else would test this idea. If the generated heat in aluminium is too high, one should use a housing made out of a synthetic material.”

PS: Adriaan further tells me he has designed a very small version “I have designed a 10-pole hub dynamo for a bicycle using the same principles as used for the 10-pole dynamo as described in KD 645. However, for the hub dynamo the rotating armature is at the outside and the stator with coils is at the inside. Although this dynamo is especially designed to be used in a bicycle, it might also be possible to use it in a very small wind turbine with a diameter of about 1 m. The idea is described in the note: “Ideas about an ideal hub dynamo” which can be found at my website: www.kdwindturbines.nl at the bottom of the menu “No wind energy”. There is also a Dutch version of this note which I have sent to a Dutch bicycle magazine to be published but I don’t know yet if they will accept the note or a summary of it.”

Posted in Adriaan Kragten, construction, People | Leave a comment

A new alternator for my little AWP windmill

I don’t usually write much at all about the stuff I get up to, but here is a story of my smaller wind turbine having an upgrade last month when I replaced the alternator.  I was helped by my friend Jonathan Schrieber.

Let’s start with a photo of the African Windpower turbine I erected behind my house in 2007.  It’s a design I did for manufacture in Harare in 1996 or so.  Already here it has a Scoraig tail and Scoraig wooden blades.  It was connected to my 48V batteries.  There weren’t so many trees around in 2007 or they were small.


Here’s a picture of the wooden blades carved by my neighbour Michel Grenier.  The fibreglass ones from Africa work ok, but they tended to break a lot, which is why we needed to replace them.  Wooden ones seem to last longer.


Here’s a shot of the AWP alternator.  It’s built with ferrite magnets inside a cast iron “drum” and it has a laminated steel core.  It’s really heavy (70kg) and tends to overspeed in high winds due to the fact that the steel core limits its output current.  Nowadays I prefer the axial flux design and that’t what we made to replace this one when its stator insulation failed.

Hoisting it up on a 20 metre tower using a gin pole and Tirfor rope hoist.  Tower diameter is 89mm overall (3″ steel pipe) which is a bit slender and snaky.

From the rooftop of the house.


It hasn’t been without it’s dramas over the last ten years.  For example here is the result of a severe storm in 2015 when the shaft snapped and the rotating parts fell to the ground.  I decided not to run it so hard after that.  I’d been using a Midnite Classic to drive it a bit hard and get more power out of it.

By the time I had fixed everyone else’s windmills (quite a bit of damage in that storm, so it took six weeks) and took my one down, the shaft fracture had already rusted a bit.  Or maybe it had been cracking for a long time…?

Seen from the big windmill.

The AWP windmill ran nicely for 2 years or more after this fix, but some time in August this year I noticed it was running poorly and producing low power.  There is a data logger on it and you can even see what it is producing right now to the right of this column in the little chart.  The stator had an internal short that I was unable to remedy without a rewind.

Here is Jonathan winding the first coil for the axial flux replacement alternator following this year’s insulation failure.  Rewinding the older stator is extremely laborious and anyway I prefer axial flux nowadays so glad to move on to the newer design shown below.


We used 60 turns of 2-in-hand 1.4mm diameter wire.  The coils came out just right to fit 15 coils in the stator.  We put 20 ferrite magnets on each steel rotor disk.

I like to use stainless steel wire reinforcement around the magnets prior to casting them in resin.  This has stood the test of time.  I don’t use glass cloth with ferrites, because the magnet stand proud in the resin without covering.  They don’t need protection from anything, as they are extremely robust.  Not a corrosion time-bomb like NdFeB magnets!

A rotor in the mould ready for resin.  The handle makes it easier to lift into place.


Here’s the stator.  10.2kg weight. Over 7kg of that is copper.

The frame of the machine ready for building the alternator.

Mounting the back magnet rotor (24.5kg) onto the big trailer hub.

The whole assembled windmill hanging off a hoist, waiting for the wheelbarrow. Over 100kg.

We didn’t have time to do much to the old blades.  They were still in perfect balance when checked sitting on a spike at the exact centre.  Leading edges were in good shape so I guess I must have done them within the last five years.

Easing the machine onto the tower top.

The down-tower wiring strapped onto its supports ready for crimp connections to the stator tails. I use small bore copper pipe to crimp the wires after they are tightly twisted together within the pipe.

A quick coat of linseed oil on the rusty metalwork.

Fitting the blades. We added an extra piece of birch plywood for luck.

Ready for lift-off. The trees have grown a bit since 2017.

Up and running sweet and smooth. I made the tail telescopic but I don’t think I will need to adjust it. Governs out at about 1200W average power.

Magnets – 20 per rotor – 75x50x20 ferrite Y30BH C8

Coils 15 of them 60 turns of 2×1.4mm dia. wire 460g each.

Nominal cut-in for 48V DC is 134 rpm.  1200W rated output at 260 rpm

Blade diameter 3.6 metres

Rotor lateral offset for furling 200mm.

Tail hinge angle 15 degrees.  Tail moment of weight 29 kg-metres.

Vane area around one square metre of 9mm birch plywood.


Posted in construction, ferrite magnets, my own projects, Scoraig | 6 Comments

16 foot homebrew in Wyoming

“Hello again.

We are in wyoming, only 30 miles from proposed LARGEST wind farm in WORLD( cherry choke project ) best wind zone in USA here.  3000 new GIANT wind generators will be installed here in  next  year. 

7200 ft elevations. 40 below zero winters, 100 + plus winds here with out storm or bad weather.

We have tested your wind mill plans here, they have worked prefect for 4 years now.. so

We built  ONE 4 TIMES LARGER ( scale )  8ft blades, 16ft total spread, on chevy 5 ton truck front axle 15K lbs weight rated bearings.

Does 85 amps @ 12 mph winds with NO resitor. 

here are some pics.. 

one pic shows it next to your standard one we built, 4 years ago.

Only problem we have now is TOO much power, new challenge is where to divert all this extra power. 

thanks

Mac”

Posted in construction, People | 1 Comment

Free workshop in Austria

It probably helps to speak some German.

 free participation in a do-It-yourself Windmill Workshop! Take advantage of the special chance!   the workshop will be soon, from 7. To 11. August in the sun park st. Pölten in the framework of the eschmiede summer workshops. It is fully supported and therefore free (you save about 300 € per person). There are only 14 places, so register quickly!

Registration at: https://www.eschmiede.at/event/windrad-selbstbau-workshop/

More information at: http://pureselfmade.com/wind-turbine-workshops/

Posted in construction, courses, ferrite magnets | Leave a comment

Axial flux alternators overheating

I got this question by email and I thought it worth answering it publicly.

Hugh, It seems home made axial flux pma’s are prone to overheating at fairly low speeds compared to conventional gas powered generators that run at 1,800 rpms or more. If so what’s the cause and how can they made to prevent overheating?  Thanks Alan, Idaho, US

Hi alan,

All generators will produce waste heat, and this can cause overheating if overloaded.

Low speed generators have a handicap which means their power to weight ratio is much lower so they are usually low power or very heavy. Higher rpm allows for a lighter and/or more efficient design but we need a low speed generator for direct-drive operation by large diameter blades.

Axial flux alternators are a good choice for small wind turbines because they are easy to build and have very low parasitic losses (magnetic drag and suchlike), meaning they are very efficient at part-load, but they do become inefficient on full load, and will ultimately overheat on overload.

When using any alternator it is important to know its limits and to design the turbine so that it will not be overloaded.  Unfortunately the book published by Otherpower does suggest that you can push a very small alternator up to 1000 W output at low rpm and this has lead to a lot of burned stators in the USA.  Burned stators are more or less unknown to me using my recipes because I make sure that the furling system works to protect the alternator from overload.

Building a big enough alternator is the best way to avoid overheating.  And protecting it against overload.  Using MPPT controllers and inverters can increase the power output available in strong winds by raising the operating voltage but this is costly.  Often the power obtained in stronger winds is of less value since the batteries are already charged at this point.

I hope this helps!  I am putting this on my blog as it is a good question to ask.

cheers

Hugh

Posted in construction | Leave a comment

Grid-tied 2F windmill self-construction project with Jonathan in Austria

Small wind turbine Do-It-Yourself Workshop incl. Installation

Windmill type:  2F 16p piggott (2m rotor, grid feeding)
Location:  FH Technikum / Energieforschungspark Lichtenegg
Participants:  15 people
Country:  Austria
Date:  Spring 2017

The machine is currently under test alongside some larger ones and doing well.

For an ebook with details of how to build the 2F click here.

read more (in German) here

Posted in construction, courses, ferrite magnets | 1 Comment

Build a Small Wind Turbine with Kostas Latoufis in Portugal August

One Week Course:

Build a Small Wind Turbine with Kostas Latoufis

August 21 to 27 2017, Montemor-o-Novo, Alentejo, Portugal

The wind turbines built in the workshops are based on the designs of Hugh Piggott, a renewable energy expert living in the off-grid community of Scoraig (Scotland), as described in his ‘Wind Turbine Recipe Book’. These wind turbines can be constructed with the use of common materials, simple manufacturing techniques and basic tools, providing a low cost small wind turbine that anyone can built. Hundreds of homemade small wind turbines have been constructed worldwide using these designs, and have proven to be robust, efficient, easy to maintain and quick to repair. Typical applications of locally manufactured small wind turbines are development projects such as electrification of village communities in the global south, educational projects in universities and schools and sustainability projects such as renewable energy electrification of ecovillages. ‘Nea Guinea’ has been organizing small wind turbine construction workshops since 2009 and has empowered many people with the knowledge of harnessing power from the wind.


Course Program

During this one week course a 600W small wind turbine with 2.4m rotor diameter will be constructed from scratch, using simple raw materials like wood for the blades, steel for the mounting frame and tail, copper wire for the coils and neodymium magnets cast in resin for the generator. The wind turbine will be the product of enthusiastic team work, as we will work in groups focusing on woodworking, metalworking and generator fabrication, along with short breaks to share what we have learned with the whole team. Woodworking will involve hand curving the blades of the rotor using drawknives and spokeshaves, planes and chisels. Metalworking will involve fabricating the steel frame to support the generator, blades and tail, with the use of welding, grinding and drilling techniques. Generator fabrication will involve winding coils, placing magnets, preparing plywood moulds and casting the stator coils and rotor magnet disks into resin. Basic woodworking and metal working skills will be taught during the course, and will enable all participants with enough hands-on experience to complete the wind turbine construction.

The course will be led in English by Kostas Latoufis. Kostas has been active in the off-grid renewable energy sector for 10 years. After completing his electrical and electronic engineering degree at the Imperial College of London (UK) in 2000, he traveled to Central America and South East Asia while also training as a silversmith. In 2004 he started working as a renewable energy researcher in the Smart Grids Research Unit (SmartRUE) of the National Technical University of Athens (NTUA). He started constructing Hugh Piggott small wind turbines in 2007 with the F.A.R.M.A. collective and continued with educational construction courses for students, in the Rural Electrification Research Group (RurERG) of the NTUA. In 2009, he co-founded the Nea Guinea not-for-profit organization, with which he has organized many small wind turbine construction courses, building windmills with rotor diameters from 1.2m to 4.2m, and many solar panel and pico-hydro construction courses. While working with Nea Guinea, he has carried out several off-grid renewable energy installations in permaculture farms in Greece and in rural development projects in Central America and East Africa. He is currently a member of the executive board of the Wind Empowerment association, a global network for the promotion of locally manufactured small wind turbines, and he is also pursuing a PhD in the NTUA on the same topic.


Detailed Program

Day 1

– Arrivals during the morning and introduction of participants

– Workshop activities (woodworking, metalworking, generator fabrication)

– Introduction to off-grid renewable energy systems (solar panels, solar pumps, wind turbines, hydro turbines)

Day 2

– Workshop activities (woodworking, metalworking, generator fabrication)

– Dinner and evening break

– Introduction to small wind turbine basics (wind energy, aerodynamics and blades)

Day 3

– Workshop activities (woodworking, metalworking, generator fabrication)

– Dinner and evening break

– Introduction to small wind turbine basics (electromagnetism and generators)

Day 4

– Workshop activities (woodworking, metalworking, generator fabrication)

– Dinner and evening break

– Introduction to small wind turbine basics (furling tail system and tower installation)

Day 5

– Workshop activities (woodworking, metalworking, generator fabrication)

– Dinner and evening break

– Introduction to small wind turbine basics (electrical system and battery connection)

Day 6

– Workshop activities (woodworking, metalworking, generator fabrication)

– Dinner and evening break

Day 7

– Workshop activities (woodworking, metalworking, generator fabrication)

– Departures during the evening


General Information:

When: 21 to 27 August 2017

 Where: Oficinas do Convento, Montemor-o-Novo, Alentejo, Portugal

Maximum participants: 17 persons

Prices:

Until 15 July: Full course: 250€ – Full Course + Accommodation + Meals: 320€

After 15 July: Full course: 300€  – Full Course + Accommodation + Meals: 370€

Accommodation and Meals: Oficinas do Convento have space for 15 people accomodations in a common space. Theres also the possibility of camping. Breakfast, lunch and diner are are included.

 FB event: https://www.facebook.com/events/161527967716247/?ref=br_rs


Organization:

 Nea Guinea: neaguinea.org/english

 Cooperativa Integral Minga: mingamontemor.pt

 Oficinas do Convento: oficinasdoconvento.com

Posted in courses | 3 Comments

TALLER DE FABRICACIÓN DE AEROGENERADORES Argentina

TALLER DE FABRICACIÓN DE AEROGENERADORES / CÓRDOBA 2017

Evento que se celebrará a la hora, en la fecha y ubicación siguientes:

Sábado, 24 de junio de 2017 a las 09:00

– hasta –

Domingo, 25 de junio de 2017 a las 18:00 (ART)

Maestro M. Lopez esquina Cruz Roja, AVEIT, Córdoba capital

Maestro M. Lopez esquina Cruz Roja

Argentina

Ver mapa

Posted in courses | Leave a comment