These are both budget systems. Installed since my last post in February.
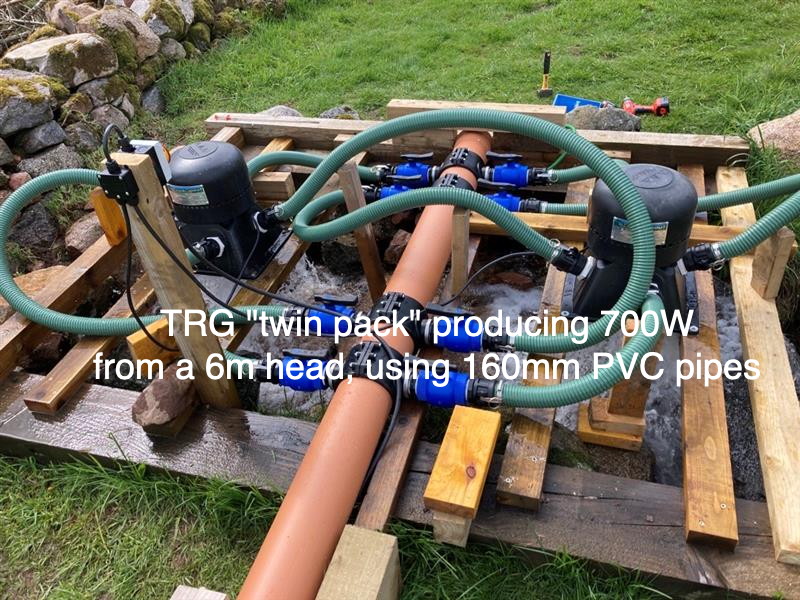
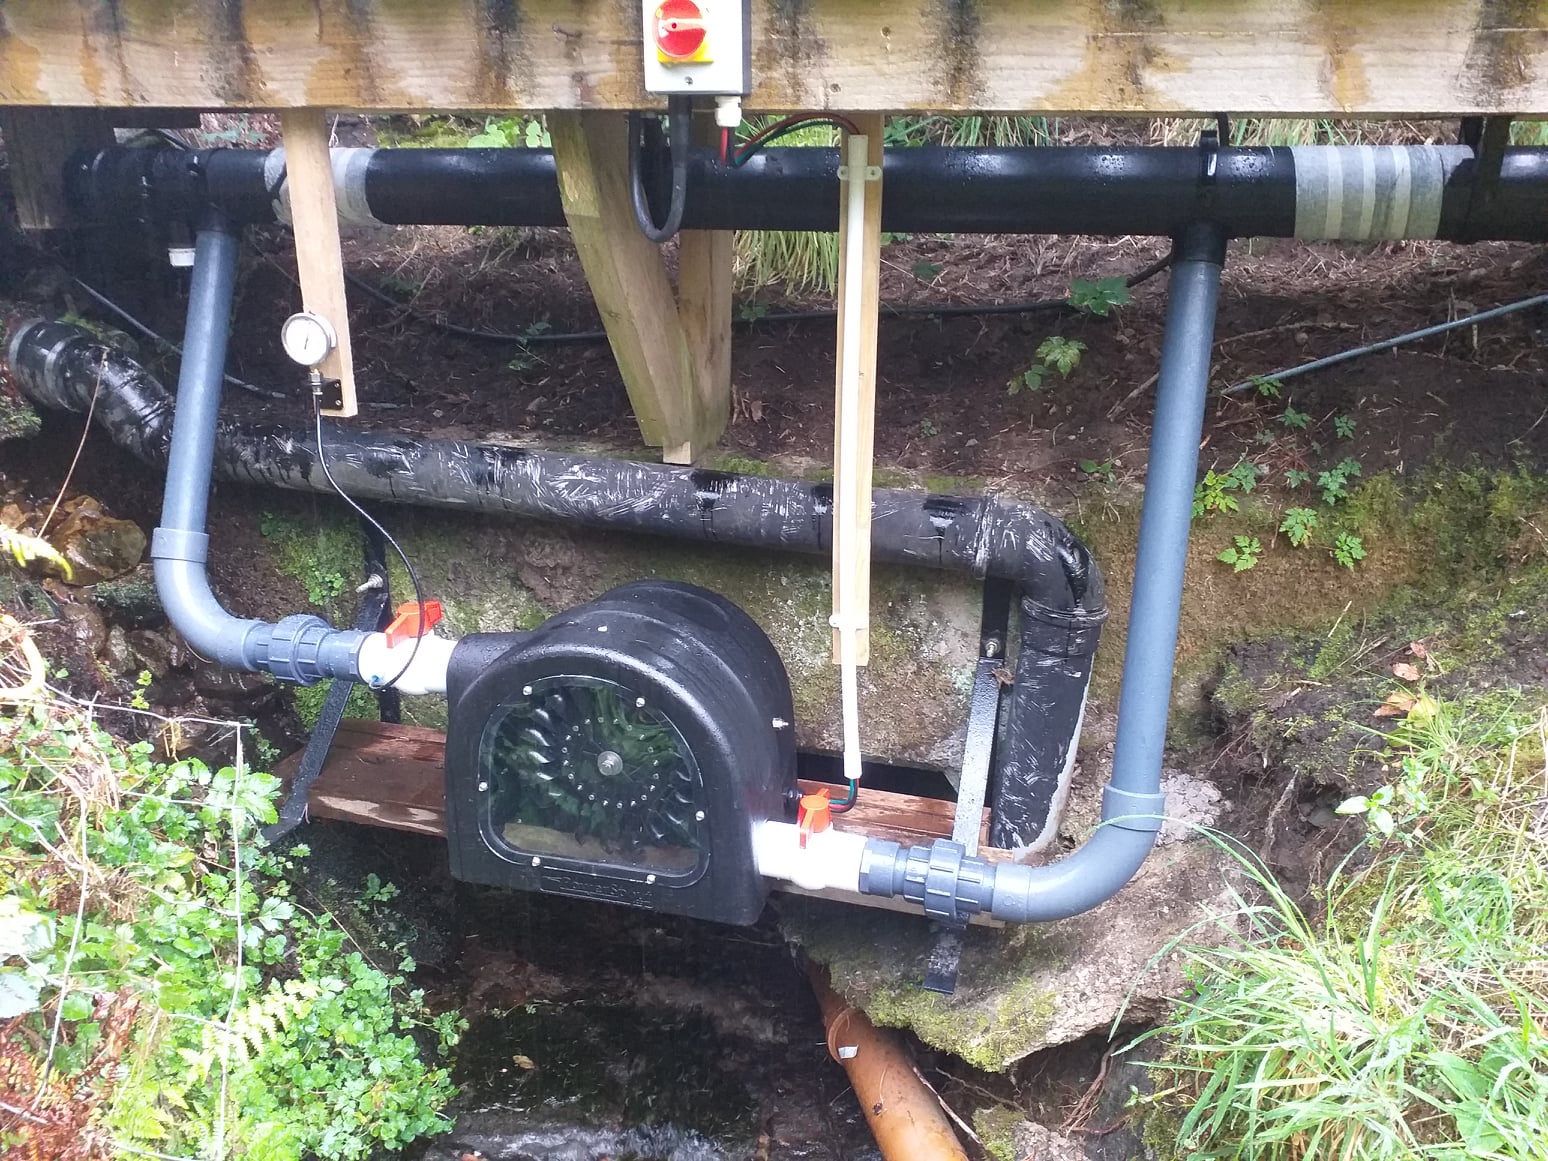
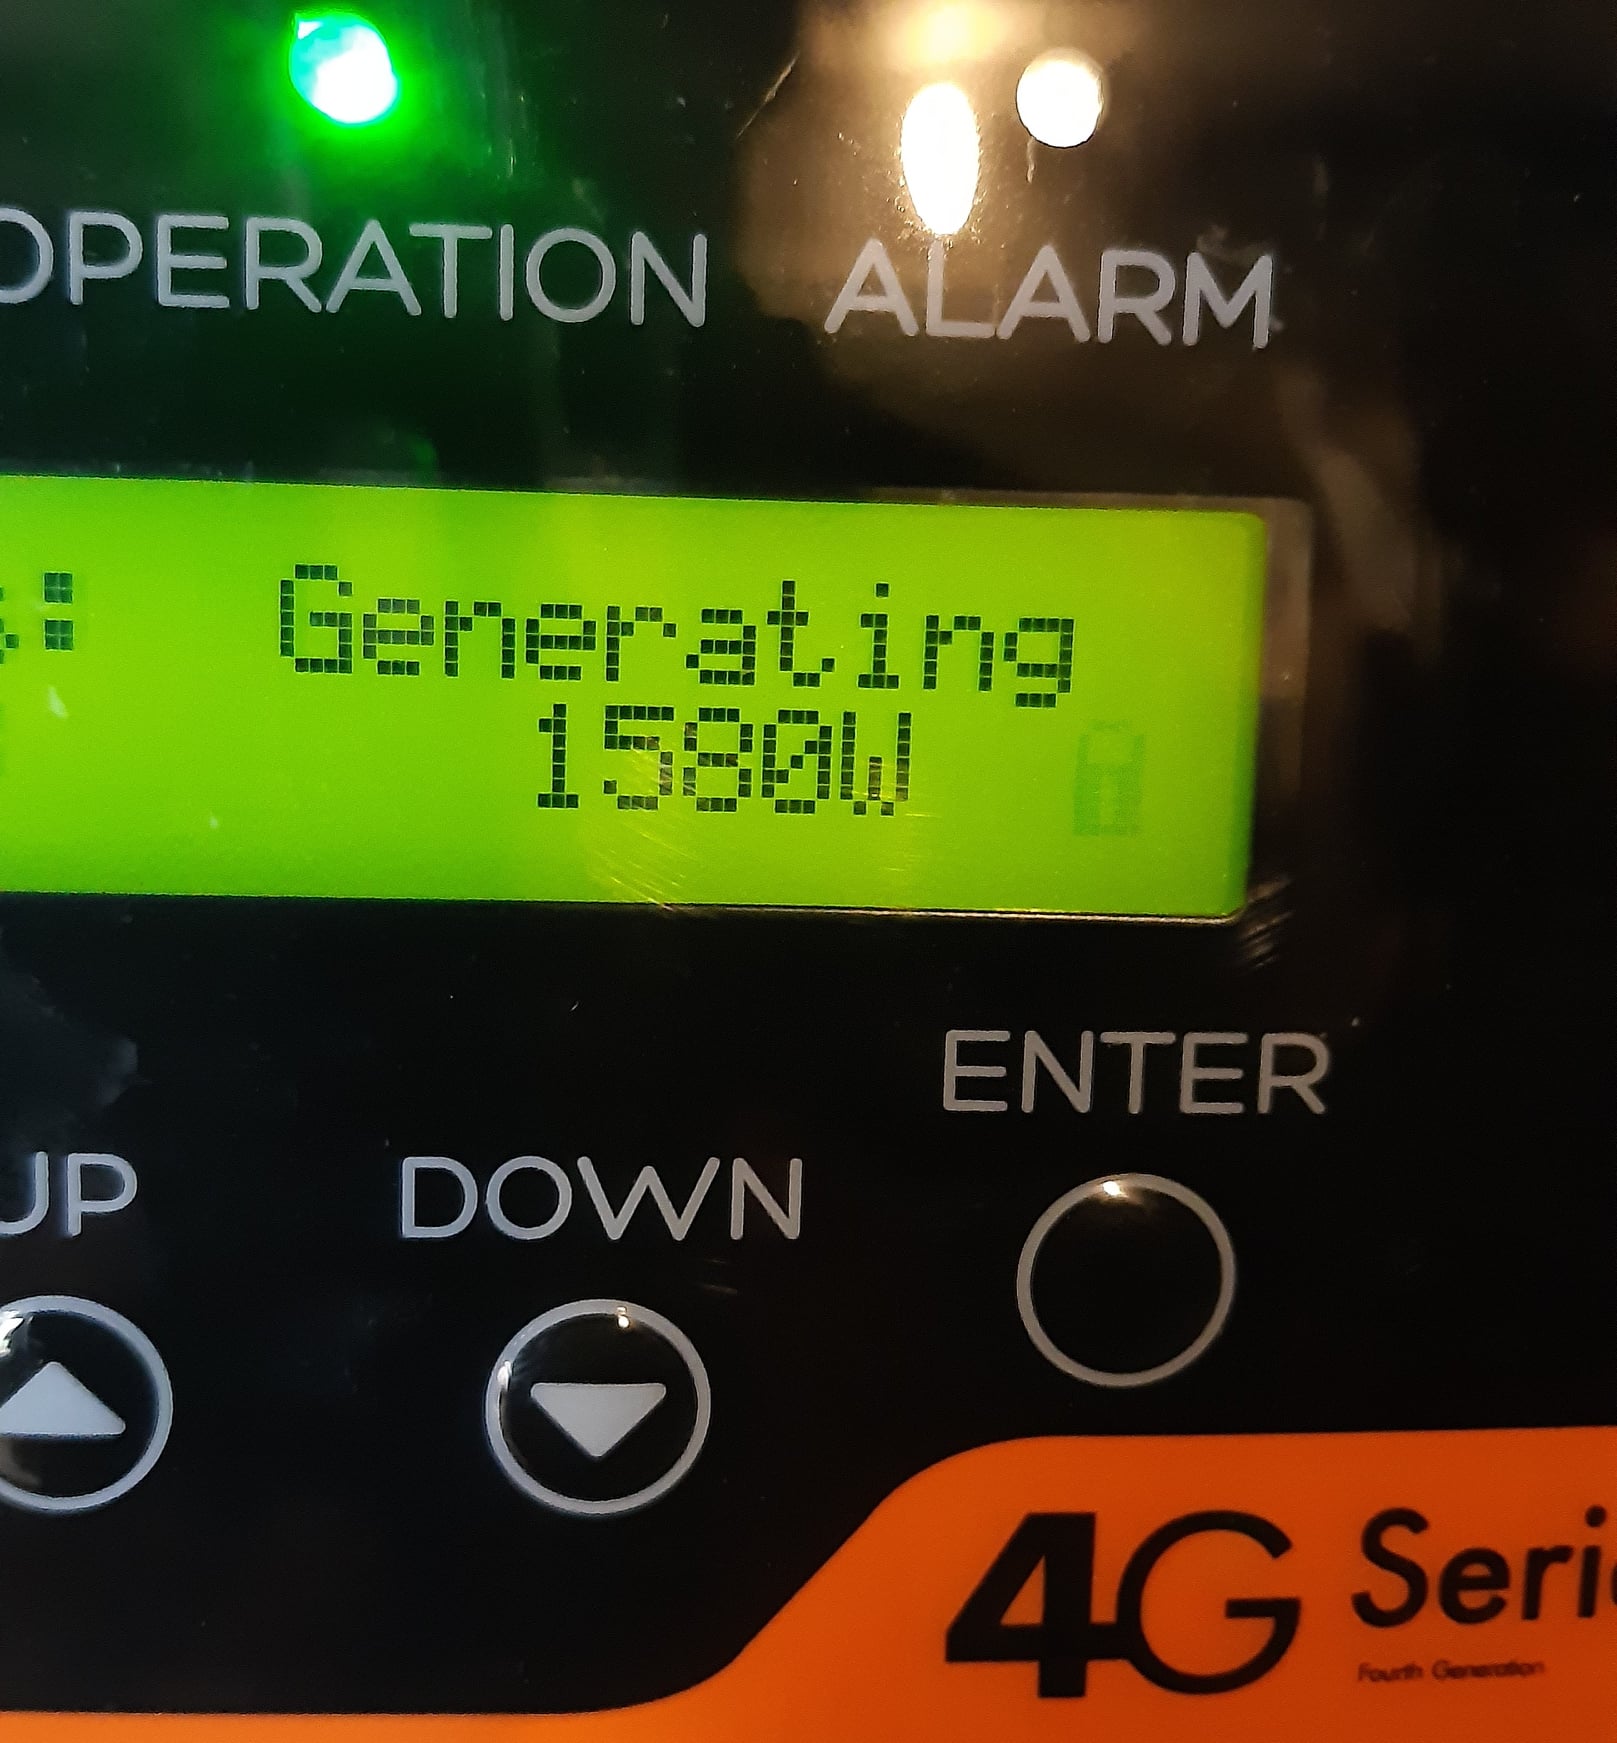
The first is a low head site in the UK. 160mm PVC drainage pipe works well if properly supported. This one is grid connected using a Ginlong Solis inverter. The “twin pack” is a very cost-effective way to buy a pair or TRG turbines like this with free shipping.
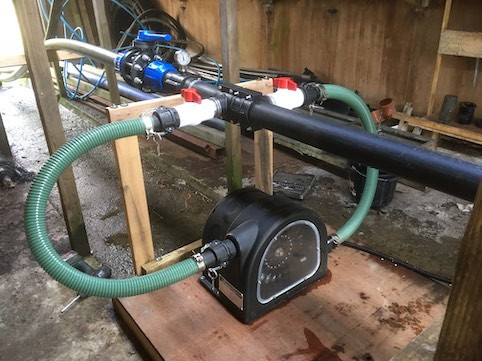
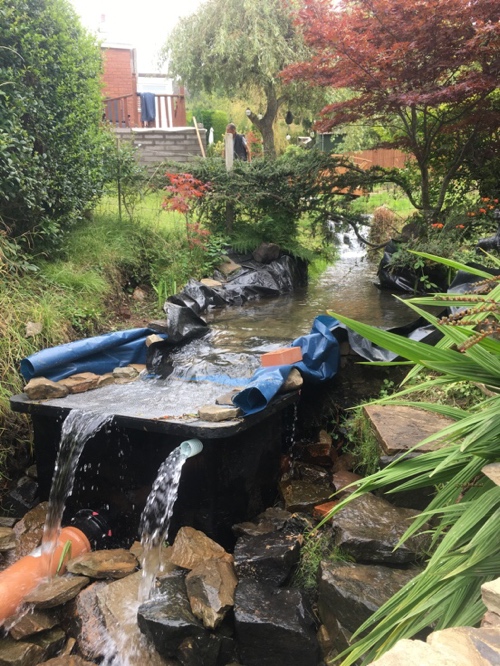
Next is a PLT turbine using 63mm PE pipe for a long 300m run to achieve a 30m head. This one charges a 12V battery using a low cost Tracer MPPT controller, and a Tristar for load management to keep the turbine under load all the time.
It’s great to see photos of turbines up and running, but most times I just have to be happy to hear that everything is going fine.
I have written a new report KD 723 which can be copied for free from my website: www.kdwindturbines.nl at the menu KD reports. The title of this report is: “Ideas about an 18-pole, 2-phase permanent magnet generator using the housing of a 6-pole asynchronous motor frame size 100 for driving a 0.55 kW motor of a centrifugal pump”. In chapter 6, an alternative 6-pole armature is described which can be used in combination with the standard 6-pole, 3-phase winding.
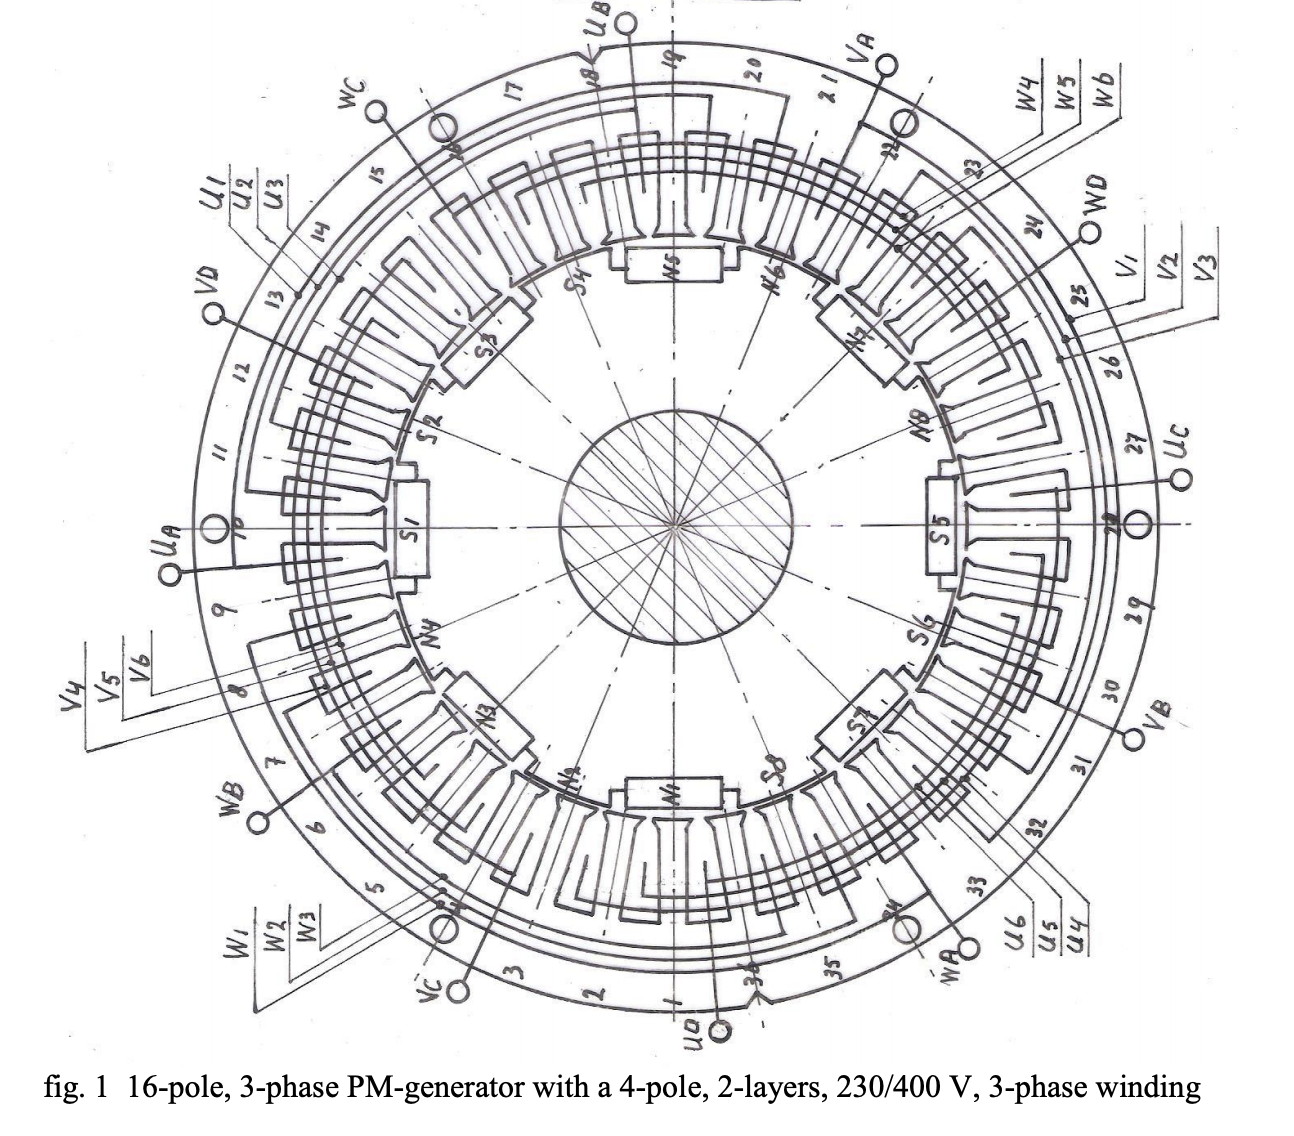
“Report KD 718 can be copied for free from my website: www.kdwindturbines.nl at the men KD-reports. The title of this report is: “Ideas about a 16-pole, 3-phase permanent magnet generator using the housing and winding of a 4-pole asynchronous motor frame size 100”.
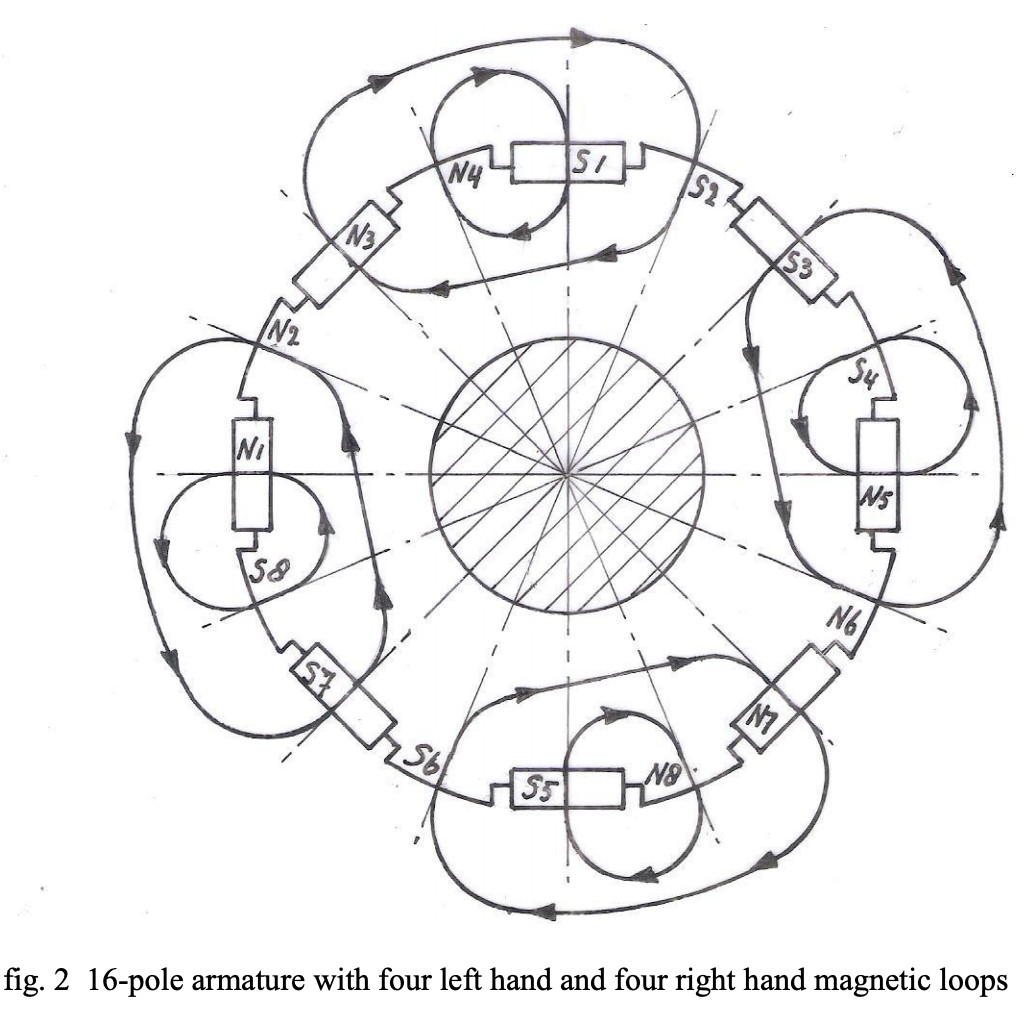
This report describes a way how to modify a standard 4-pole, 3-phase asynchronous motor such that it can be used as a PM-generator for a wind turbine for 24 V or 48 V battery charging. Manufacture of the new armature is rather easy as the magnet grooves are wide and shallow and in parallel to the armature axis. The magnet costs are low as only a rather small magnet volume is used. Mechanically the armature has sixteen poles but physically it has four poles and therefore it can work together with the standard winding of a 4-pole motor. The flow pattern is given in figure 2. The armature pole angle is 2.5° larger than twice the stator pole angle and the fluctuation of the sticking torque is therefore almost flattened. A front and a side view of the armature and the stator is given in figure 1.
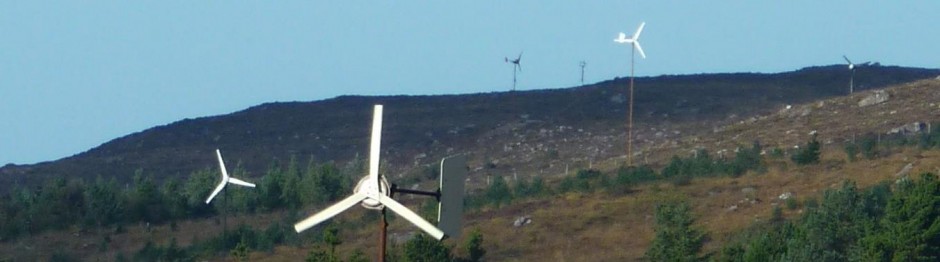
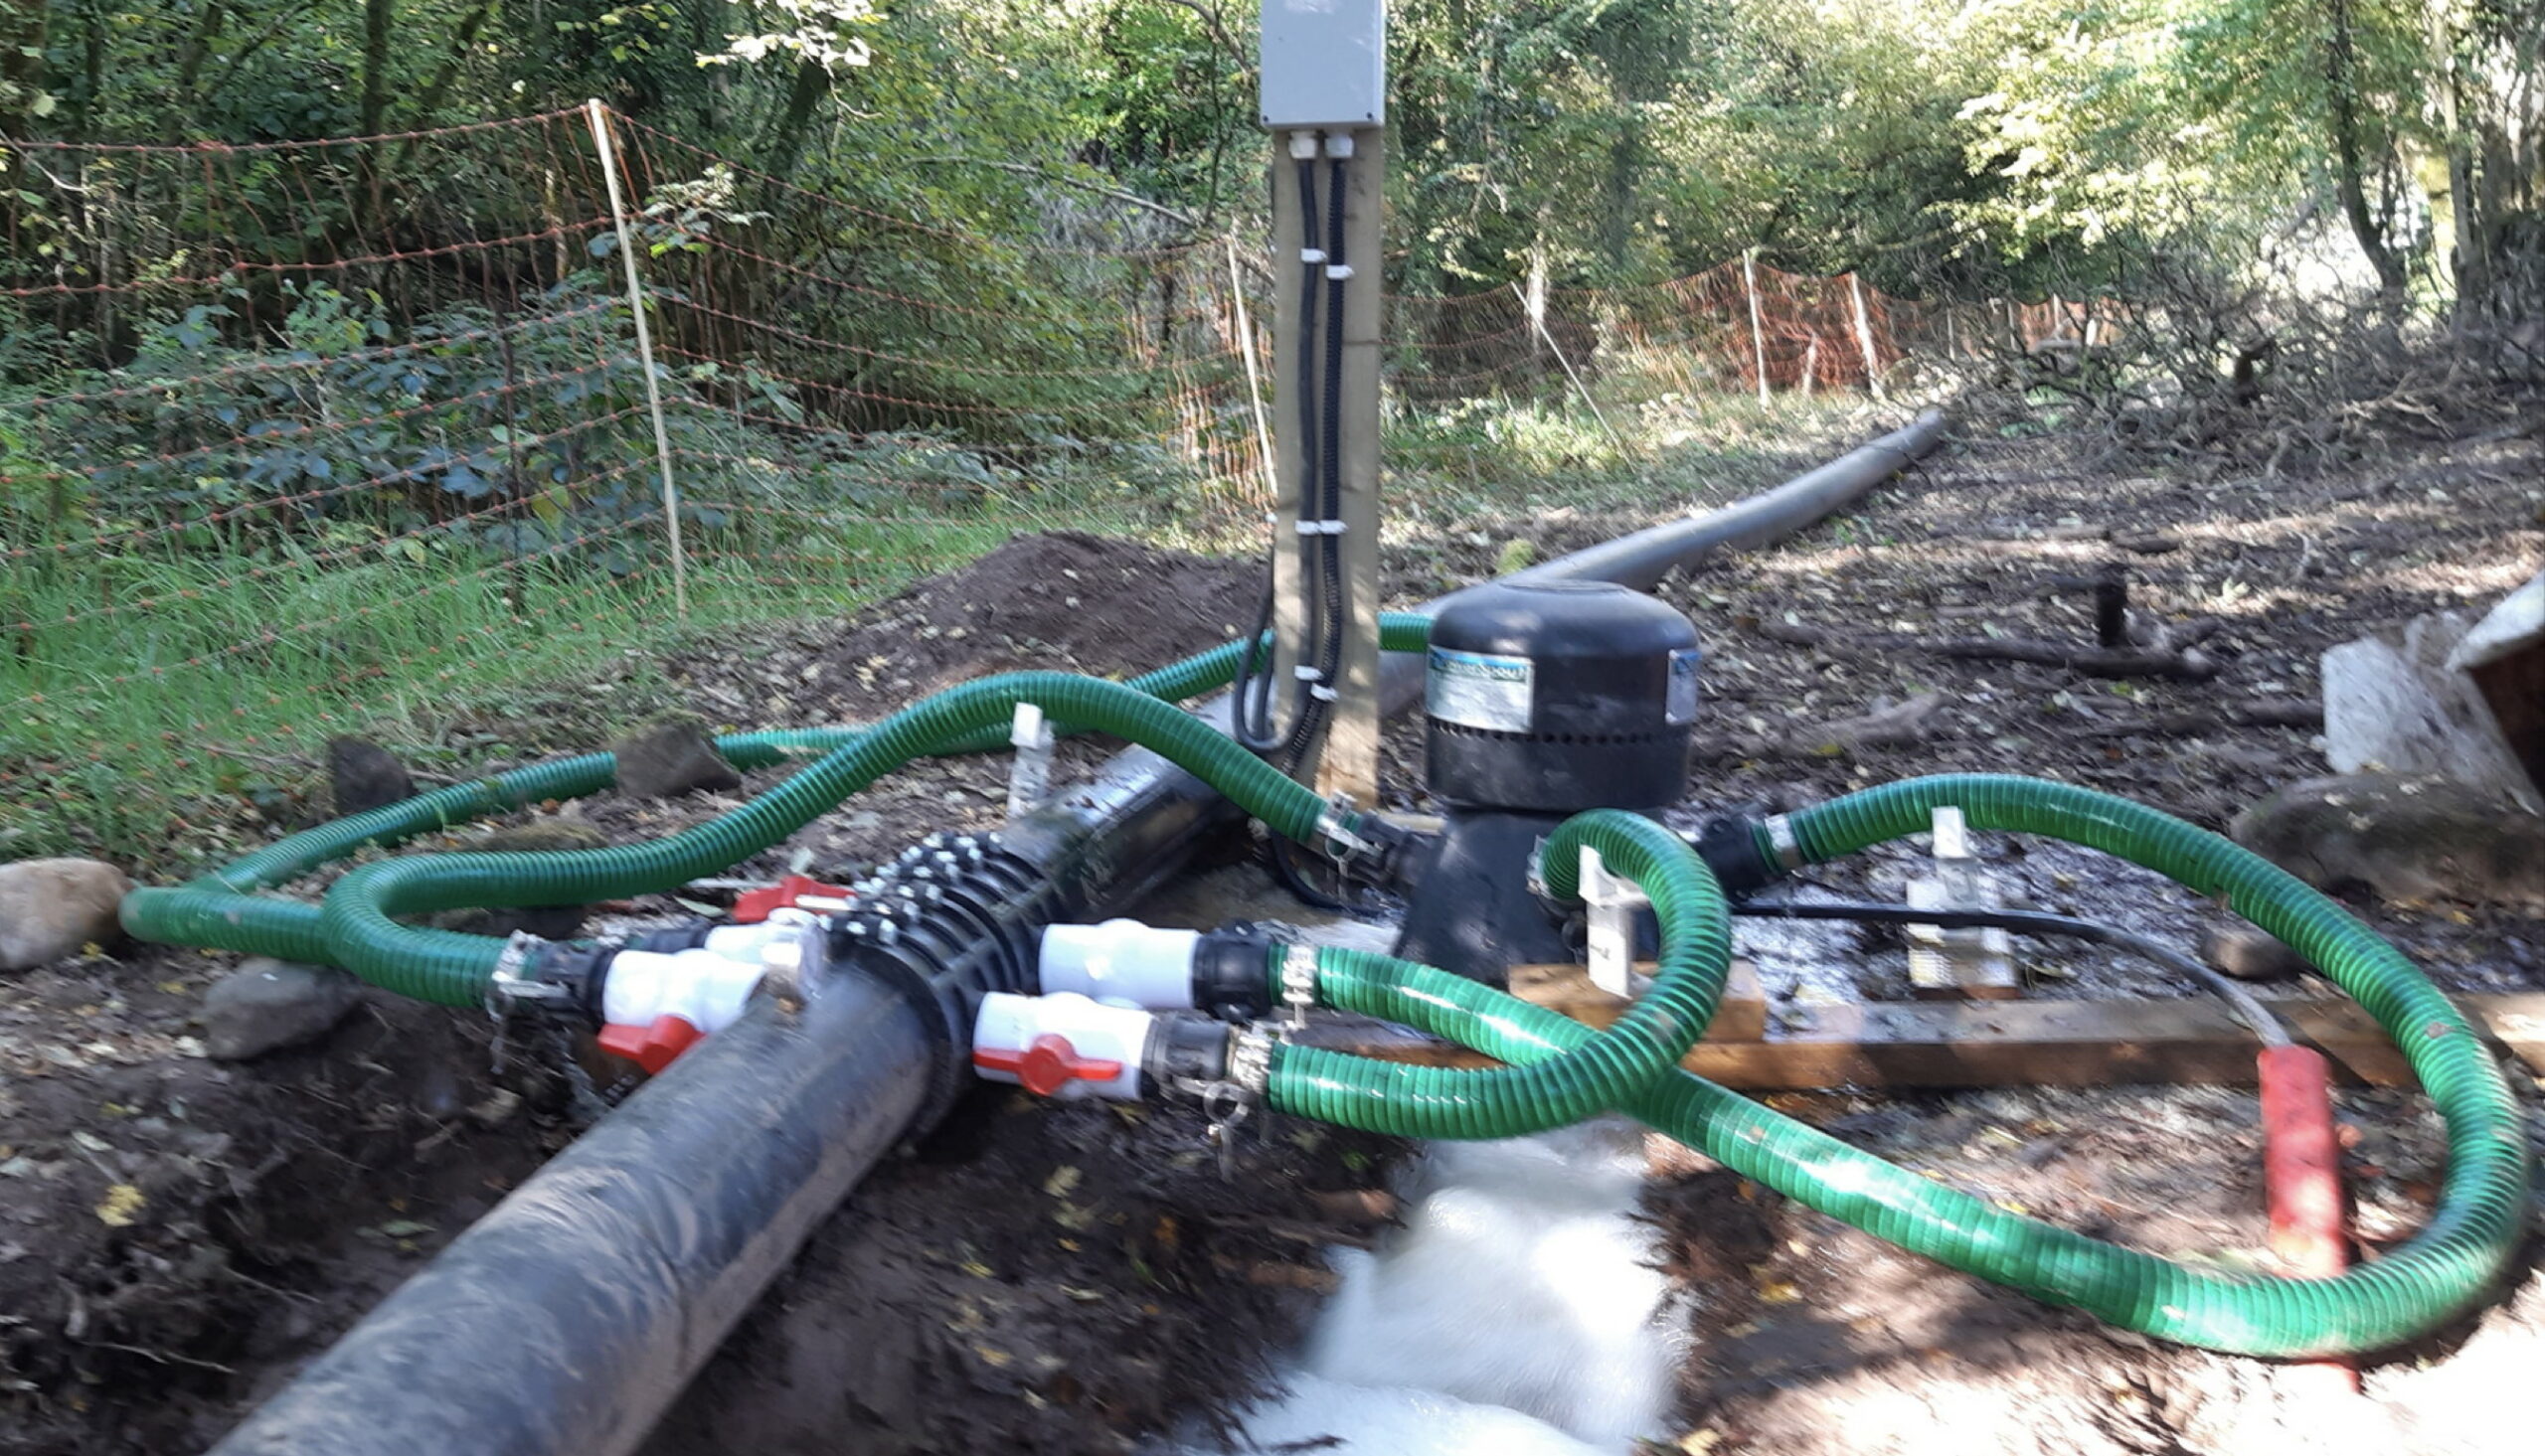
Bear in mind that the turbines are freshly installed and working so the setup is a bit rough in some cases. Most owners will do a bit more work around and about or even build a shed although this is not necessary for protection against the rain. These turbines happen to all be in the British Isles.
Most of my sales are to people who do the work themselves, so I spend plenty of time explaining stuff. I love it. Especially when I get to see pictures.
PLT in Scotland
Grid connected turbine
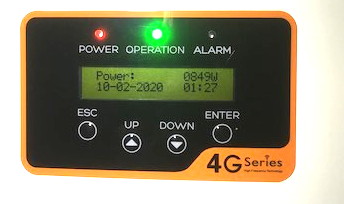
Inverter displays output
TRG turbine in Ireland
TRG output
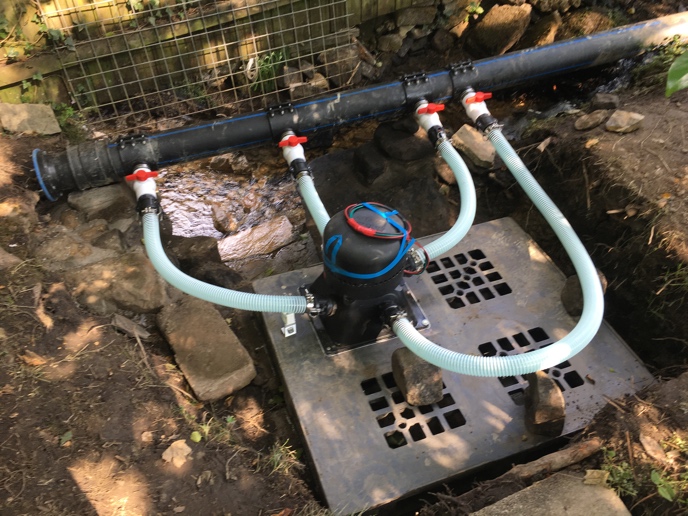
Intake tank with filter screen on top
TRG in Wales Using low maintenance black plastic pallet for Turgo base
PLT in Ireland
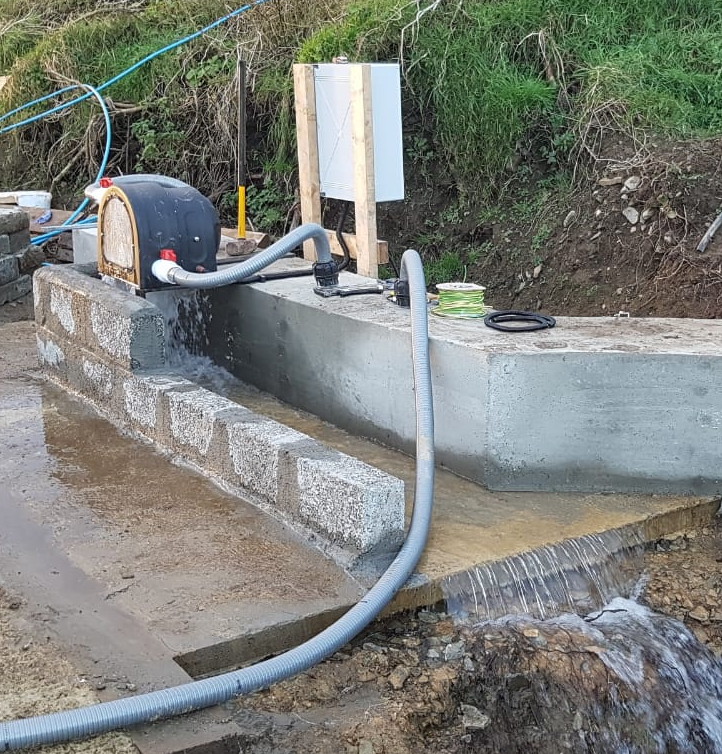
This PLT in England was expected to produce 548W but kicking out 720W off grid.
My most recent wind turbine plans are dated 2014, and I don’t really make enough sales to justify updating them now but the list of UK suppliers at the back of my Recipe Book is out of date for sure. Often the best supplier will be a local one, but I will offer a list of suppliers below in case this is useful.
Magnets
Neodymium Blocks 46mm x 30mm x 10mm thick from Spider Magnetics These are grade N35 which is not particularly strong, but it is hard to find this size neo magnet these days. Powermagnetstore have N40 which is better for keeping the rpm down, but the cost is somewhat higher. You can get N42 from First4magnets but the cost is almost double the cost of the N35 ones. Thanks to Adriaan for pointing out Enesmagnets in Poland who can offer 50 x 25 x 12 magnets in N38 which should work well with the Recipes.
Find a local workshop that offers profile cutting services. Bear in mind that it will be much cheaper to buy a larger batch if possible (shared with friends?). I like to get them sent to be galvanized on their way to me. Another option is to get them powder coated but I don’t find this lasts so long in my maritime environment. It is possible to cut your own disks using a grinder (a big polygon works OK). Harder to get a precise result this way.
Trailer hubs
There are several online suppliers. Trailertek offer stub axles and hubs for small turbines around 2m diameter (beware of the seal behind the bearings which will not last due to thrust of the wind, so safer to remove this seal) and also some nice solutions for bigger machines at low cost. I have also used AutoW for hubs and they offer cheap options. Towsure are a good option too. You may wish to replace the bearings with decent ones such as SKF or other major brands.
I hope this helps. If anyone needs further advice please contact me at [email protected]
The long awaited final version of Jon’s study based on data he collected here in 2012-2014 has finally been published and is free to read or download here courtesy of Wind Engineering.
An important conclusion is the the table in the Recipe Book that shows the anticipated energy yields for various site windspeeds was (amazingly) not too grossly misleading. “Piggott’s estimates for the annual energy yields of his Recipe Book machines are an accurate prediction of their average real-world performance (+5/−20%). However, the performance of individual machines can be significantly above or below this (+70/−51%). These deviations are sometimes intentional, where reliability is prioritised over power performance, but often unintentional.”
Jon had already given me the basic data, much of which has been available on a page on this blog since 2015. The page complements his article in many ways, giving some more detail of the individual turbines’ performance.
I have been thinking a bit about how best to orient solar arrays lately. I know that the optimum angle (for maximum total energy generation per year) is quite low, because most of the energy arrives in the summer, but if you want to get consistent power year round then a steeper angle is desirable, to maximise the slender solar in winter. There are also issues around shedding snow in some places (steeper is better) and around making best use of bright diffuse cloudy light (lower angle is better for places that do not see much sun at all).
I had read that it makes sense to split the array and put one part facing east and another facing west (some buildings force you to do this) and in the end you can get almost as much energy per day that way, losing maybe 15% compared with a south-facing array. The east array works well in the morning and the west works well in the evening and so you get more consistent power output without the high peak in the middle of the day, which is likely to be more than your battery can actually absorb in some cases.
So that started me thinking about lead acid batteries and how you charge them and I realised that they take a lot of charge at first, but later in the day they need less because they have arrived at the absorption voltage and the current tapers downward during the absorption phase. During this downward taper, the charge controller is rejecting much of the solar power so it is effectively irrelevant whether your array can produce high power output (unless you have a diversion load such as water heating off the surplus solar which everyone should have but very few actually seem to bother with).
So the logic took me to a conclusion that I have not heard or seen before surprisingly and I thought I’d share it here. If you face your array south east then you can get about 50% higher power in the morning, thus getting the battery charged quicker. Having reached the absorption voltage in the middle of the day, the array needs less power in the afternoon so it does not matter that this is less than you could have had available using a south facing array.
Here are some charts of solar power availability hour-by-hour to 2 arrays sited where I live, one facing south and the other south east (each at 45 degree angle) showing how the available power varies over the hours of the day in each month of the year. I got this data from https://re.jrc.ec.europa.eu/pvg_tools/en/tools.html The red curve is south facing and the blue one is the south east facing array.
It may not look like it, but the blue curve is about 50% higher power than the red one in the mornings which I reckon will bring the battery up to its absorption voltage quicker and allow it to absorb more power in the course of a day than it could with the red curve, even though the red curve offers more energy overall. That’s because you can’t actually use that extra afternoon energy to charge a lead acid battery because it cannot absorb power at such a high rate during the latter part of the charging cycle.
Recently I have written two new reports about small PM-generators which make use of the housing of an asynchronous motor frame size 80 and four neodymium magnets size 80 * 20 * 10 mm. Report KD 681 describes an 8-pole PM-generator which needs a rather simple 8-pole, 2-layers winding. Report KD 683 describes a 4-pole PM-generator for which the standard 230/400 V winding can be used. Both reports are added to my website www.kdwindturbines.nl at the menu KD-reports and can be copied for free.
It would be nice if you add this message to your blog.
Adriaan Kragten has tested one of his small alternator designs and published results showing it is compatible with a 1.02m diameter rotor for a low power wind turbine.
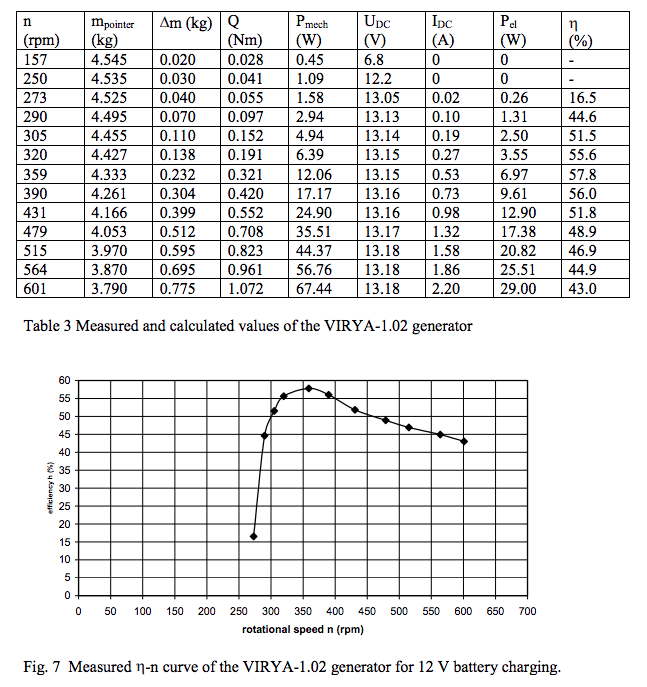
A new chapter 6, “Generator measurements”, has been added to public report KD 678. A teacher of a technical school has built the 8-pole generator of the VIRYA-1.02 and I have measured this generator on my test rig for a 12 V battery load. The torque level of the generator appeared to be lower than expected but the matching in between rotor and generator is still acceptable. The maximum electrical power for the rated wind speed of 8 m/s is about 24 W.
From: Mike Allen
Subject: Re: A Wind Turbine Recipe Book
Date: 12 April 2013 10:53:18 BST
To: jytte
I recieved the book yesterday and when it arrived I thought ‘this isn’t worth £12’.
But how wrong I was once I’d opened the envelope and settled down to read the contents with a cup of coffee. 3 hours later the coffee was stone cold and I was still reading the book.
Loads of info to be getting on with.
I’ll email Hugh when my terbine is up and running with some pics.