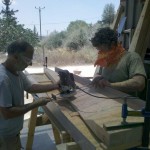
I thought everyone might like to see these photos of construction of the 4200 mm diameter turbine in Palestine that Noam sent me in July.
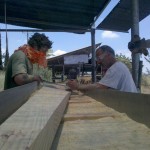
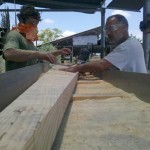
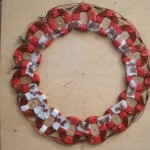
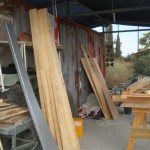
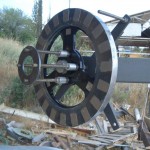
Attached please find images of our new 4200 build. You may see the blade jig we had built to speed up the blade make. We first cut it with a band saw than machine it on the jig with a Frazer. You may see the first magnet disk mounted on the frame and the image of the 20 coils 54 turns (2 mm diameter copper), stator ready for casting. Since the metal disks of the magnets are powder baked and the vinyl ester has very good adhesion to the polyurethane powder material, I hope no leaks for moisture will reach the magnets. Also the stainless steel band around the disk is easy to make and make a nice finish. Next magnets batch are going to be Epoxy coated, and I hope this further protection of the magnets will help.
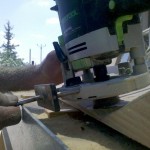
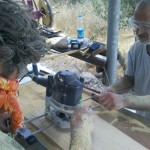
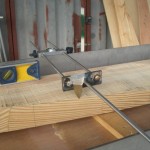
The last time I saw someone use a router jig like that was in 2009 at the Rencontres Creative in France. It’s pretty noisy and dusty. Ingenious though.

These big blades can be pretty hard work with a drawknife. Actually I like the chainsaw for crosscutting down to a line and clearing the bulk of the wood before the drawknife. It’s probably quicker than the router at doing that if less precise. If the cuts are close together then you can knock out the bits between with a hammer.
Surely doing the 50% – trailing edge element is a doddle too? I suppose a few chords of the curve might speed things up a bit but only if the batches were big enough to justify setting up the jigs…
I’ve always wanted to make something to pass the blanks through a bandsaw, twisting it as it progresses forward using a worm drive or some-such! Maybe one day I’ll tire of the drawknife and have a go – for now it’s too much fun to do it with the edge tools!
You can see more photos here http://www.facebook.com/WindEmpowerment
I don’t think its feasible to do the curved shape but it is possible to rough out the twisted shape and the thickness this way.
This would be easy enough to set up for the windward side of the blades.
Did they have an equally ingenious way of carving the airfoil side?